Now its not only for 10 years, but lifetime whatsapp License..
Just follow the tutorial from my ealier post.. if it's done n your license only for 10 years, just update your whatsapp via Playstore.
In update process, sms verification is needed. Whatsapp will send you a short message contain 6 digit code. Put the code to your phone, then check your license .... viola .. Now you get lifetime License
After released SGYD Firmware Update in October, this month Samsung releases update again
This update for Regions: Indonesia, Malaysia, Philippines, Singapore, Vietnam
You can download directly from sammobile.com using Samsung KIES or via OTA (only work in stock ROM and stock Kernel)
But if you wanna flash it with ODIN, MNgez@XDA allready split it. You can download Odin Flash Package : here
Hello SGYD users. A few a days ago I post about status bar Mod with 14 toogle.. Now I will share another statusbar Mod.. TABBED STATUSBAR with fully JB themed. This Mod made by samsoul16@XDA-dev.
3. Now copy Downloaded zip file (TaBBeD_JB_StatusBar.zip) and put it to the SD Card. Do Not put it in any folder. It ain't work.
4. Turn Off your Device and go to Recovery Mode By Pressing and Holding this Key Combination Volume Up + Home Button + Power Button.
5. Once you entered into the Recovery Mode. You will see the Blue Color User Interface where you can't use Touchscreen. Instead use "Volume Up and Volume Down to move Up and Down". And "Home Button to Select". And "Power Button used to go Back"
6. Once you entered into Recovery Mode, select "Apply Update from SDCard" option and choose downloaded ClockworkMOD which is "CWM-try1.zip".
7. When you're in ClockworkMOD Recovery,
8. After wipe, select "Install zip from sd card" option. And then
"choose zip from sdcard", Now browse the
"TaBBeD_JB_StatusBar.zip".
9. Reboot your Phone by select "Reboot System Now".
Done...
*This status bar based on EVO ROM, but it's work on any Custom ROM. If you wanna try on your stock ROM, install 14 Toggles Statusbar non deodexed Stock ROM first.. before use this status bar
In this tutorial, I use AKURO-DATA2SD which made by kurotsugi@XDA-dev. This method is made for SGY, but it's can be used in SGYD too. This method will move all data and system apps to sdcard.
This method only works for fresh Stock ROM or TechnoDuos ROM. Because if you have another apps such Link2SD, A2SD Darktremor etc installed on your device, this app willnot work (Conflict).
Tools Needed
1. Fresh Stock ROM (see this post for detailed explanation how revert to Stock ROM)
2. SDcard with ext3 partition, (see this or this post for detailed explanation about SDcard partitioning)
3. Kernel with init.d support, such as iDuos 1.31 (see this post for detailed instruction)
4. Rooted SGYD and Root Explorer
3. Now copy aromakuro1_2.zip to the SD Card. Do Not put it in any folder.
4. Open Root Explorer, create anewFordernamed "sd" (without the quotes) in the/system
5. Turn Off your Device and go to Recovery Mode By Pressing and Holding this Key Combination Volume Up + Home Button + Power Button.
5. Once you entered into the Recovery Mode. You will see the Blue Color User Interface where you can't use Touchscreen. Instead use "Volume Up and Volume Down to move Up and Down". And "Home Button to Select". And "Power Button used to go Back"
6. Once you entered into Recovery Mode, select "Apply Update from SDCard" option and choose downloaded ClockworkMOD which is "CWM-try1.zip".
7. When you're in ClockworkMOD Recovery,
8. After wipe, select "Install zip from sd card" option. And then
"choose zip from sdcard", Now browse the
"aromakuro1_2.zip".
9. Reboot your Phone by select "Reboot System Now".
10. Check /data/kuro_akuro.log if the app and dalvik succesfully mounted copy /data/data to /system/sd.
Hello SGYD user, tody i will share about Spare Part.apk. An app that can make your SGYD (or other android 2.3 Ginger Bread phone) more smooth.
Just download from herethen install to your Android Phones.
How to set :
1. Open the Spare Part.apk
2. Set "Window animation" into Fast
4. Set "Transition animation" into Fast
5. Checked "Fancy input animation"
6. Obey "Font size & End button behavior"
7. Check "Haptic feedback"
8. Check "Compatibility Mode"
9. Close
Now try it from your device & feel the difference :)
Hello SGYD users, now it's time to share an apps. A favorite application that can help you calibrate namely Battery Calibration. This little app can be found in the Android Market for free, here is the link. But keep in
mind, Battery Calibration only works on rooted SGYD. Calibration needs to be done after flashing a new ROM. By doing this, information that stored on "batterystats.bin" will be deleted. Batterystats.bin is a file that stores all the activities information since Android phone battery used for the first time. If you do the calibration, all information will be erased.
How to :
1. Plug in your phone to the charger 2. Wait till it charges to 100% (or force earlier calibration with the button bellow) 3. Click "Battery Calibration' 4. Unplug your phone
That's all for now, I hope it will be usefull for SGYD or any other Android phone
Hello SGYD user, last month Samsung releases SGYD Firmware Update.
This update for Regions: Indonesia, Malaysia, Philippines, Singapore, Vietnam
You can download directly from sammobile.com using Samsung KIES or via OTA (only work in stock ROM and stock Kernel)
But if you wanna flash it with ODIN, MNgez@XDA allready split it. You can download Odin Flash Package : here
And if you facing some problem with Odin, you can download CWM nandroid back up here
Recent times, I write a post about Free Internet access via DroidVPN. In some region, it's doesnt work well. And now I will share another alternative protocol that can be used..
DroinVPN setting
As seen on the picture you can use this setting :
Protocol = TCP
Port = 143
This setting work well on Indonesia using Three or XL Axiata Operators
Hello SGYD user, today I will share "How to change your stock Statusbar with 14 Toggles Statsusbar" 14 Toggles ussualy package with Cust Rom or it's can be install only on deodexed Stock ROM.
This work IS NOT FROM ME,its from German user called Kundal. He has make
it with the guide from XDA-developers. It's work fine on rooted Stock ROM (no deodexed).
3. Now copy Modified ROM and Patch file to the SD Card. Do Not put it in any folder. It ain't work.
4. Turn Off your Device and go to Recovery Mode By Pressing and Holding this Key Combination Volume Up + Home Button + Power Button.
5. Once you entered into the Recovery Mode. You will see the Blue Color User Interface where you can't use Touchscreen. Instead use "Volume Up and Volume Down to move Up and Down". And "Home Button to Select". And "Power Button used to go Back"
6. Once you entered into Recovery Mode, select "Apply Update from SDCard" option and choose downloaded ClockworkMOD which is "CWM-try1.zip".
7. When you're in ClockworkMOD Recovery,
8. After wipe, select "Install zip from sd card" option. And then
"choose zip from sdcard", Now browse the
"14-Toggles.zip".
9. Reboot your Phone by select "Reboot System Now".
Hello SGYD users, now I want to share with you about Deleting SD Card partition.
Partitioning SD Card is needed if you want to expand your Android device internal memory, or wanna using script, tweak etc. I allready post how to create partition in here (via CWM recovery) and here (via PC/Laptop using Mini partition tool)
But if you wanna revert to the original state of your SD card –to the state it was when you bought it—or want to partition your SD card again because you want to increase or decrease the size of sd-ext partition you created, there will always be the necessity to remove your existing ext3/4 partition.
Remember playing with your SD card –such as partitioning, editing, deleting, etc—will delete all the data stored on your SD card. So, it's suggested to backup (copy) all the data of your sd-card to your computer or any other storage media.
Steps
1. Move all your data
including apps and dalvik cache stored in your sd-ext partition to your
internal memory. Use APPS2SDGUI app or run these commands in terminal emulator.
su
a2sd nocache
a2sd remove
2. go to Menu > Settings
3. SD card and phone storage
4. Unmount SD card
5. Format SD card
You can follow below step to create auto text on Android:
Step 1 : To create auto text on android you need an application. This application’s name is Smart Keyboard Pro.
You can download it via Google Play .[Google Play]
Step 2 : Next, you need auto text collection in file format ‘backup.zip’ which can be downloaded at this link.
Step 3 : Install Smart Keyboard Pro and then move ‘backup.zip’ file to folder ‘smartkeyboardpro’ in SD Card.
Step 4 : go to Settings >> Language & Keyboard >> Smart Keyboard Pro
Step 5 : go to Smart Keyboard Settings >> Backup Setting >> Restore from SDCARD
Step 6 : Search Text Prediction, set to be like this:
Auto-capitalization: on
Quick fix: off (to doesn’t automatically replaced when typing)
Show suggestion: on
Autocomplete: off
Swap punctuation : off
Space after picking : off
Contact Dictionary : on/off (optional, if you want suggestion take from contact name in phone)
Always suggest: on (to appear what suggestion when typing something)
Step 7 : To ad Auto text, do following steps:
search Custom Auto text
then tap ‘Add Auto text’
column 1 for word that will show Android auto text such as “haha” later will appear to be: °º ° =))Hªªhªªhªªhªª ° °º
column 2 for Android auto text
Open file that has been downloaded by you, there are you can add so many auto text.
Step 8: After all done, return to ‘Backup’ settings menu again to
create new auto text ‘backup’ which was added before. The first backup
file will be overwritten by new backup you just made it.
Hey SGYD user's, in this article i will share a Restorable Nandroid Backup that made by MNgez@XDA . Restorable Nandroid Backup is suitable for SGYD user who get system crashesor BOTLOOP and don'thaveODINSupportingDevices
1. Download and Save CWM-6102.zip on the Root directory of SDcard2. Extract and save the "File Stock ROM" in the root microSD / Sdcard / clockworkmod / backup / "here"
In Terminal Emulator add this script: type:
su
cd /sdcard/clockworkmod/backup/"Folder File Backup" example : cd /sdcard/clockworkmod/backup/GT_S6102_DXLF2_XSE md5sum *tar > nandroid.md5 ==>to create a file named "nandroid.md5" that CWM needed for Flashing/restore
3. Reboot and go to CWM Recovery Mode 4. In CWM Recovery Mode: Select "Mounts and Storage"5. mount all partitions (for writing to unmounted)6. please go back to the menu before7. Select "backup and restore" > "Advanced Restore" > Select the folder "File Stock ROM" that we saved earlier8. Select "Restore system"9. Wait until to finish than reboot...
Note
- For better results, you can turn off the device and re-entry stock recovery mode to do a Wipe Data and Cache Wipe
Hello SDGYD users, this is another build.prop tweak. This tweak can improve your android Browsing access. This tweak tested on SGYD with Stock ROM DXLF2 + Custom Kernel iDuos 1.3.1 by MNgez and posted on her blog.
1. Script to improve the performance of a data packet :
Hello SGYD user, in this tuorial i will write a tutorial about build.prop tweak. Before that, I will explain about Tweak and build.prop first.
What is tweak?
Tweak is the activity of a person who made some changes to improve the performance of a hardware or software. This activity can be likened to do some fine tuning of a product in order to give the best performance according to expectations of the person.
What is build.prop?
Build.prop is a script that holds the majority of the runtime properties to use when booting the android, similar to config.sys in dos or in different OS environment variables. Build.prop only hold variables, and do not run the existing script with its own. Anything placed in the build.prop depending on the android system itself with regard properties in it and is used by the android system or some kind of setting that is used when you turn on the android device.
How do I edit build.prop?
There are various ways that you can take in the edit build.prop, for example you can use ADB or you can also copy build.prop then edit and push back or they can be edited directly, but in this article I suggest that you use the third parties application that can be used to edit build.prop with build prop editor which you can download from here.
Things to do before editing build.prop?
Backup is one you should consider before you make your build.prop editing, because if you fail to edit, the solution you should take is that you have a restore the backup. But if you forget to backup I suggest that you re-flash your android. Therefore, be careful when editing build.prop DWYOR.
List Build.prop
Here is a list of some build.prop that you can edited
Data Tweaks ro.ril.hsxpa=2 ro.ril.gprsclass=10 ro.ril.hep=1 ro.ril.enable.dtm=0 ro.ril.hsdpa.category=8 ro.ril.enable.a53=1 ro.ril.enable.3g.prefix=1 ro.ril.htcmaskw1.bitmask=4294967295 ro.ril.htcmaskw1=14449 ro.ril.hsupa.category=6 net.tcp.buffersize.default=4096,87380,256960,4096, 16384,256960 net.tcp.buffersize.wifi=4096,87380,256960,4096,163 84,256960 net.tcp.buffersize.umts=4096,87380,256960,4096,163 84,256960 net.tcp.buffersize.gprs=4096,87380,256960,4096,163 84,256960 net.tcp.buffersize.edge=4096,87380,256960,4096,163 84,256960 Effects data speed and signal May not be the same for everyone Powersave Tweaks ro.ril.disable.power.collapse=1 Allows the phone to sleep better pm.sleep_mode=1 Saves power when phone is sleep wifi.supplicant_scan_interval=150 Allows your wifi to scan less, saving more battery UI Tweaks windowsmgr.max_events_per_sec=150 debug.sf.hw=1 video.accelerate.hw=1 All make UI more responsive Media Tweaks media.stagefright.enable-player=true media.stagefright.enable-meta=true media.stagefright.enable-scan=true media.stagefright.enable-http=true Makes streaming videos stream faster ro.media.dec.jpeg.memcap=8000000 ro.media.enc.hprof.vid.bps=8000000 Increases quality of photo and videos ro.media.enc.jpeg.quality=90 Raises quality of JPEG images camera/camcorder mods ro.media.capture.maxres=8m ro.media.capture.fast.fps=4 ro.media.capture.slow.fps=120 ro.media.capture.flash=led ro.media.capture.flashMinV=3300000 ro.media.capture.torchIntensity=40 ro.media.capture.flashIntensity=70 ro.media.panorama.defres=3264x1840 ro.media.panorama.frameres=1280x720 ro.camcorder.videoModes=true Better camera and video results Boot Tweaks debug.sf.nobootanimation=1 Gives your phone no boot animation [B]persist.sys.shutdown.mode=hibernate Makes phone boot rapidly fast. System Tweaks ro.ext4fs=1 Allows your phone to use an ext-4 file system ro.HOME_APP_ADJ=1 Forces your home launcher into memory Miscellaneous Tweaks Change the Dalvik VM heap size dalvik.vm.heapsize=64m To enable the hard key lights to stay on while the screen is on and not timeout ro.mot.buttonlight.timeout=0 Try disabling BLN if your having trouble getting this to work To make the phone come off of the "black screen" in the middle of, or the end of phone calls when you pull the phone away from your face mot.proximity.delay=150 **May kill the dialer** To disable usb debugging popup persist.adb.notify=0 To give your phone an HD effect fitting a little more on the screen, look for this in you current build.prop and change the 240 to: ro.sf.lcd_density=X (225 or 230) To enable the menu button too unlock the phone ro.config.hw_menu_unlockscreen=true To stop the phone from waking up when pressing the volume key ro.config.hwfeature_wakeupkey=0 To make the phone ring faster when dialing out ro.telephony.call_ring.delay=800 Source : Master&Slav@XDA
Hello SGYD users. Recently I post about How to Install ClockWorkMod Recovery, and now I will post about SD Card Partitioning Via ClockWorkMod Recovery (CWM).
How to :
1. Already installed ClockWorkMod Recovery (CWM) on your phone.
* If not, please here
* If so, Skip this / no need to do it again.
2. Backup all data on the SD Card using PC / Laptop, cause through this process, it will format your SD Card.
3. Go into CWM Recovery, then, select the Advance
5. Then, select Partition SD Card.
6. Then, select the size of EXT Partition you want.
* If you use 16GB SD Card, 1 GB EXT partition is enough.
* If you use 2GB SD Card , select the minimum size or about 500MB or less
7. In the EXT format, choose the number you want (in this case i use EXT2)
* select number 2 for EXT2 format
* select nombor 3 for EXT3 format
* select nombor 4 for EXT4 format
8. In the Swap Size, you can let it empty or you can set to 128MB.
Downloading android apps from Google Play Store directly to PC/Laptop is become a dream of all android lover. Especially, If their gadget doesn't have internet access or only have limited internet access. So, I hope after reading this tutorial, they will get a solution.
How to:
1.If you use google chrome v17 (you can see in the menu option located at the top right exactly under the close button, then select "about google chrome"), you can skip this first step, but if you have a version below or doesn't have google chrome you can download and install google chrome, you can donwload it fromhere. (Why use google chrome? Because applications that use plug-in downloader from google chrome)
3.Right-click google chrome icon on your desktop, go to the Properties option, and then add the code:
--ignore-certificate-errors
for example, the addition of the code:
C:\…\chrome.exe --ignore-certificate-errors
atau
“C:\…\chrome.exe” –ignore-certificate-errors
4.Run Chrome using the shortcut you just modified.
5.Go back to APK Downloader's settings page (Wrench tool icon –> Tools –> Extensions) and you should no longer see a red message. The page should look like the right half of the screenshot below. If you no longer see a red message, you are good to go and can proceed to the next step. If you see a red message, go back to the beginning of this guide and try again.
8.Fill the email and device ID (like a serial number) from your android phone. To find out the device ID, you type in *#*#8255#*#*. Examples android-1234567890abcdef then your device ID is 1234567890abcdef.
Or you can also find out your mobile device id by downloading & Install Device IDfrom Play store. The 16-character string after android- is what you need to enter in the Android Device ID field.
9. After that, you open the app you want to download in google play store via google chrome, by clicking android icon on the upper right next to the URL address
10. Apps have downloaded to your PC and after finish you can move it to your android device.....
Note :If you are confused, you can look directly at the official website here,
1. Install TUN.ko installer by clicking the install button to check if we have a working tun module for your device (remember: only checked "Android Version" and "kernel") wait until finish, it will reboot automaticly.
2. Install DroidVPN, login with the registered email n password sent to your email.
3. If you are using a free account make sure to change your server to Phoenix or LA by tapping the flag & use ICMP connection protocol
4. Press START button.
5. If the "DroidVPN is now connected" message appeared, press the home button
6. You can now start browsing and all your internet connection will pass through our VPN server.
TIPS:
You can select the server you want to use by clicking the flag icon on the upper right corner.
To quickly start or stop your vpn connection, add the DroidVPN widget to your home screen for a 1 tap connect vpn.
NOTE: FREE ACCOUNT is limited to 100MB/day and can only login to FREE server.
Subscription is required if you want to use all the servers and remove the 100MB/day limit
UPDATE : Since Dec 21 2012, this method didn't work :(
WhatsApp Messenger is a cross-platform app and SMS alternative that relies on an internet data plan to send messages to friends. You can install this app on android for 1 year free trial, after that you must pay 0.99$/year.
This trick can be use to extend your whatsapp license for 10 year. Enjoy it
Gadget needed :
A. Iphone / Ipad
B. Samsung Galaxy Y Duos (also can be done in another android /BlackBerry / Nokia)
How to extend:
1. Register your Android WhatsApp phone number on WhatsApp for iPhone (doesn't need to change the sim card, just register the number).
2. Enter 3 digit SMS code sent to your sim card and enter it on WhatsApp for iPhone.
3. Re install whatsapp for Android, then register your number that already registered in iPhone and you will get 10 years license.
Note: if you don't have iPhone to extend your WA license, I can help you to extend your WA license.
Just write your name & phone number in the comment box or email me (arimasheru@gmail.com).
Hey GYD users, if you forgot your unlock pattern here is the solution -
1. Enter wrong pattern for more than 5times
2. Wait until your phone prompts "forgot pattern".
3. Click on forget pattern.
4. Enter your google account user name and password which u use in your phones.
5. Click login.
That's it! you can later reset the unlock pattern.
Note:If you dont have google account then give a hard reset
1. Download ROM file and Patch...
2. Put it on the SD Card. Do Not put it in any folder.
3. Reboot your phone and go to CWM .
4. In CWM, wipe Data/Cache.
5. Flash Pre-Final ROM via CWM. and use it for a few minutes, reboot
6. Install ICS Fusion V1 ROM via CWM, reboot..
7. Flash All in one fix (patches) via CWM .
8. ICS Fusion V1 ROM is successfully installed.
Enjoy it!!!!
If you found any error, drop your bugs and ask for help in here
Hey Galaxy Y DUOS users... Here is another Custom ROM for you...
b16h22@XDA who made this ROM. This rom is highly minimalistic.It comes with a very few apps pre-installed.The aim of this rom is to let the user decide which apps to use according to their taste.
Screenshoots
Features
Rooted,Deodexed,zipaligned etc..
Based on DDLG1 firmware
MIUI music player
Highly minimalistic.
Scrolling cache is disabled for smoother scrolling.
Lidroid 15 toggles.
6 lockscreens
swipe to remove notification
Modded touchwiz launcher with
*5 icon dock
*Transparent 4x4 app drawer
*List view
*fly-in animation
Ics style task switcher
Bootanimation,boot sounds,and shutdown sounds are removed.
And some more.
You are advised to be flash the Stock ROM first with DDLG baseband,
DWYOR
Downloads
1) EVO-X 2.1 [minimalist] ROM - evo_x2.1(duos).zip
2) Patch for EVO-X 2.1 [minimalist] ROM - Download
How to Install
1. Download ROM file and Patch...
2. Put it on the SD Card. Do Not put it in any folder.
3. Reboot your phone and go to CWM .
4. In CWM, wipe Data/Cache. You can also Wipe Dalvik cache (Optional)
5. Install EVO-X 2.1 [minimalist] ROM via CWM.
6.Instal Patch via CWM...
7. Reboot.
8. EVO-X 2.1 [minimalist] ROM is successfully installed.
Enjoy it!!!!
If you found any error, drop your bugs and ask for help in here
Follow this GUIDE : * make a nandroid backup using cwm before doing this method 1. Make 3 partitions on sd card (FAT32, Ext2 & Swap) Sorry, i'm not write this step again. For details tutorial you can go here
2. Install Custom Kernel (init.d support & swap support) in this case, use iDuos kernel 1.3.1 a custom kernel for Galaxy Y duos made by manoranjan2050@XDA. For details tutorial you can go here 3. Install Link2SD How to use Link2SD in this method : a. After download & Install Link2SD from Google play
b. Go to : Settings --> Applications --> Development --> Tick USB Debugging & Allow mock locations
c. Run Link2sd & do it like this :
d. Turn on Your phone --> run Link2sd again & check..
4. Install A2SDGUI - Darktremor A2SD GUI How To use A2SDGUI in this method : a. After download & Install A2SDGUI from Google play.. b. Run A2SDGUI – if A2SDGUI can’t start.. Don’t worry.. c. Reboot Your phone.. d. Boot Stock Recovery (Press & hold: Power + Volume Up + Home keys & release when sgy duos logo appears) e. Apply update from sdcard -->CWM-try1.zip --> install zip from sd card --> choose zip from sdcard --> dtapps2sd-2.7.5.3-beta04-signed.zip --> Yes – Install --> Reboot system.. Download dtapps2sd-2.7.5.3-beta04-signed.zip from here f. Run A2SDGUI.. Now A2SDGUI Working.. Don't tick Dalvik Cache on SD-EXT..!!! Don't tick Dalvik Cache on /cache..!!!
5. Increase Performance (Increase of RAM) Download Swapper From Market @ Play Store (Google play) How To use Swapper in this method : a. After download & Install Swapperfrom Google play.. b. Run Swapper Configuration --> Tick Active Swap on Boot --> Swap File Position: SD Card FAT Partition --> Swap file size: 200 --> Save – Wait until finish…!!!
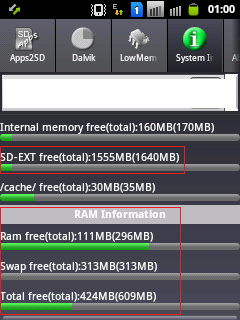
c. Now run A2SDGUI --> System Info:
NOW YOU HAVE MORE PERFORMANCE & YOU CAN SAVE YOUR INTERNAL MEMORY…